After following our tips on how to hang your artwork, next is to learn how to light it properly. From conserving the piece to making it look the best, lighting has a huge effect on how artwork is displayed. Here are just a few tips that will help with the longevity of your piece all the while flaunting its beauty.

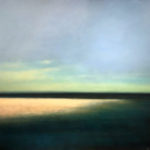
Alejandro Rosemberg, “Autumn Series – Painting No. 1”
LIGHT FIXTURES
Light fixtures can determine how your piece is conserved as well as how the overall display is achieved. To begin with, let’s look at which type of lighting system is best for your work.
- TRACK LIGHTING OR RECESSED CANS: These two types of light fixtures are the best due to their flexibility and professional look.
- Track lighting is the preferred method, typically used within a gallery setting, because of its maneuverability along the track and adjustable heads.
- NOTE: This method of lighting is used when lighting a whole wall as well as drawing attention to the details of a piece.
- If looking for a clean look without noticeable fixtures, recessed cans are the best option. Try to find ones with adjustable heads to provide more flexibility.
- NOTE: This system is suggested for larger pieces for it provides an even light intensity with its equidistant fixture heads.
- Track lighting is the preferred method, typically used within a gallery setting, because of its maneuverability along the track and adjustable heads.
- PICTURE LIGHTS: If you’re not willing to completely renovate your house to light your art, we suggest buying picture lights that hang above the piece. Though they are not as flexible and may cause more damage due to its close proximity to the piece, picture lights are the most affordable fixture that still provide professional, appropriate lighting.
- LIGHT BULBS: Light bulbs are obviously the most essential part of lighting a piece. The type of bulb you use will prevent fading, cracking, and much more.
- FLUORESCENT: DO NOT USE THEM!
- HALOGEN: Halogen lamps are not really suggested, but they can still be used if placed at a safe distance and are equip with UV filters.
- LED: These bulbs are highly recommended because they do not emit UV and have little heat.
LIGHT PLACEMENT & INTENSITY
Once you have decided which light fixture fits best with your artwork and space, now is the time to adjust the light’s direction and intensity.
- LIGHT PLACEMENT: The following tips are geared towards light fixtures that are adjustable, but if you have another type of lighting system, still keep these in mind when lighting the art.
- DOWNLIGHT: You will want to downlight the piece instead of uplighting it – uplighting is generally used for furniture and larger media.
- LIGHT ANGLE: This is when hanging and lighting art have similar installation methods. The light should hit the piece at 30 to 45 degrees, which should be around 60″ from the floor or the center/eye-level point.
Below is Jeremy Mann’s “A Long Abandoned Dream” lit correctly (left) and incorrectly (right). The left displays the proper degree to which the light should be adjusted, hitting key focal points of the piece; whereas, the piece on the right is incorrectly lit due to the light fixtures pointing above and around the art.
- LIGHT INTENSITY: From light fixtures that can dim or a sunny room, there are a few different ways to illuminate your work.
- LIGHTING RULE: A “rule” to keep in mind is to have the piece three times brighter than the rest of the room.
- NATURAL LIGHT: It is suggested that paintings are not hung in direct natural light because the UV and infrared radiation can harm to the art. Instead, place the piece on a north-facing wall or one that has indirect lighting for an optional lighting solution.
We hope these tips have enlightened you about the lighting process! Stay updated with our blog and social media accounts to find more “How To” posts and make sure to #PGHowTo on Instagram/Facebook to tell us about how our blog has helped you with the art in your space!
Remember, our #PrincipleAtHome social media posting contest is still going on until the end of July – view this link to learn more!


